**UPDATED 2/28/2020**
I love to reduce my carbon footprint. One way I do is in cleaning my home, I use reusable rags, make my own cleaning solution, and make reusable mop covers. Today I am sharing with you my free crochet pattern for making Crocheted Dry/Wet Mop Covers Using Bulky Yarn. How do you reduce your carbon footprint? Let me help you get started.
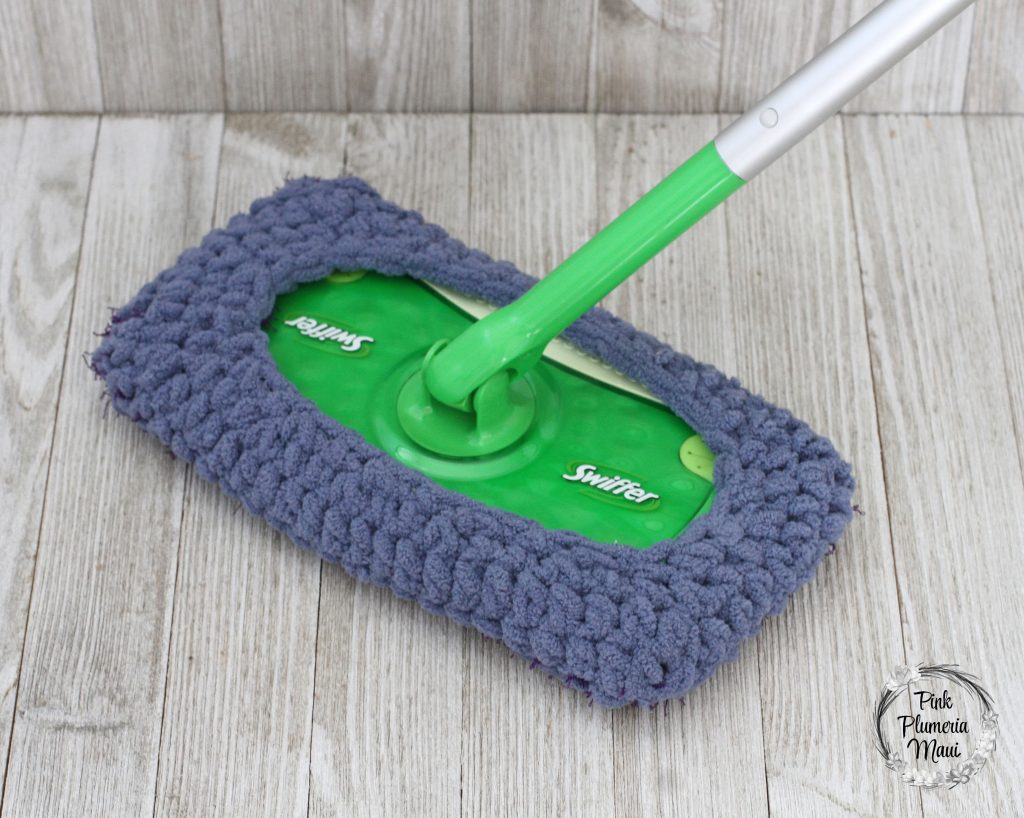
I use a lot of Bernat Blanket Yarn in my projects. I end up with small balls of yarn and I love making mop covers with them. The yarn is great for scrubbing floors and washes and dries well too. I also have added Scrubby Yarn from Red Heart Yarn to my wet mop to give it a little extra cleaning power. The pattern starts with creating a rectangle and then working around the rectangle in the round to create a stretchy top. It doesn’t get much easier than that!
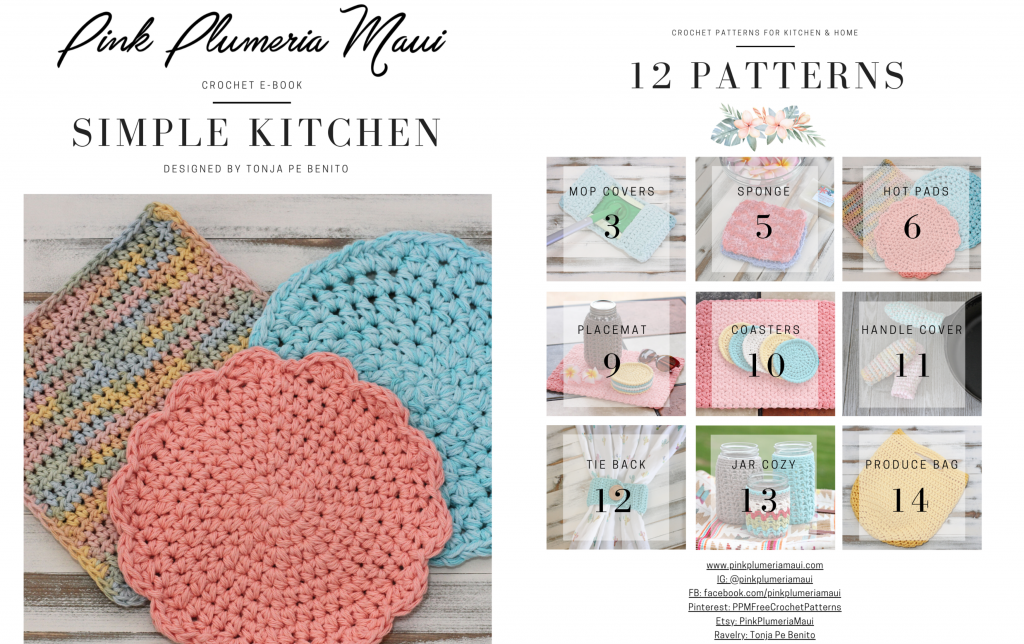
This pattern is in the Simple Kitchen E-book and all will be released as free patterns however you can find them all in one convenient PDF. Here are the patterns that are included:
Note: I’ll update the links as blog posts are created for each of them
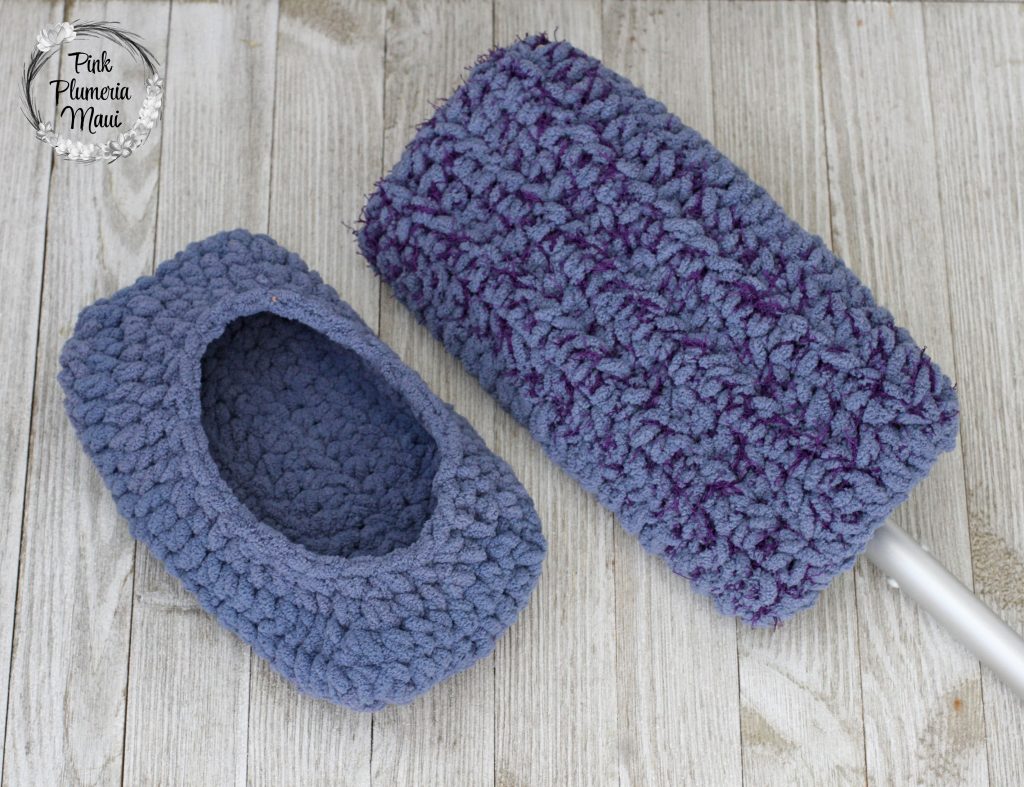
- Slip-On Mop Cover
- Dry/Wet Mop Cover
- Super Simple Sponge
- Simple Hot Pad
- Bulky Simple Hot Pad
- Simple Square Hot Pad
- Aloha Placemat
- Home Dec Coaster
- Sturdy Cast Iron Handle Cover
- Simple Curtain Tie Back
- Ulana Jar Cozy
- Simple Produce Bag
You can find the Simple Kitchen E-Book HERE! Please share with me on social media. You can follow me on Instagram HERE and on Facebook HERE! Tag me @pinkplumeriamaui and use #pinkplumeriamaui.
Materials:
- L/8.0 mm Hook, I love my Clover Amours
- G/4.0 mm Hook, I use Clover Amour to weave ends in if needed
- Super Bulky Weight, #6 Yarn
- Stitch Marker
- Scissors, I love my Clover Patchwork
- Tapestry Needle, I love my Clover set
Yards/Ounces:
Skill Level:
Beginner
Size:
One Size
Gauge:
4 x 4 inches = 10 hdc x 6.5 rows of hdc
Dimensions:
Width of the bottom is 10 inch and the height is 4.5 inches.
Abbreviations:
ch = chain
sl st = slip stitch
sc = single crochet
hdc = half double crochet
hdc2tog = half double crochet 2 stitches together
sc2tog = single crochet 2 stitches together
Notes:
- Chain 1 does not count as a stitch.
- I recommend using bulky yarn but you could use two or three strands of cotton yarn too.
- To make wet mop cover repeat with the dry pattern but use scrubby yarn with bulky yarn in rectangular part of the pattern.
- Use a stitch marker at the beginning of row if you need to visually see ch 1.
Pattern:
With yarn and L/8.0 mm hook.
Row 1: Ch 21, hdc in 2nd stitch from hook, hdc in each stitch across. Turn work. (20 hdc)
Row 2 – 7: Ch 1, hdc in each stitch. Turn work. (20 hdc)
You now have a rectangle and will be working around the rectangle that to create top of mop cover. You will be starting by turning your work and working on the short side of the rectangle.
Row 8: Ch 1, 8 hdc evenly along short side, 20 hdc on the long side of rectangle, 8 hdc evenly along short side, and 20 hdc on long side. Sl st to top of ch 1. (56 hdc)
Row 9: Working in the round, ch 1, 6 hdc, hdc2tog, hdc2tog, 20 hdc, 6 hdc, hdc2tog, 20 hdc, sl st to top of ch 1. (54 hdc)
Row 10: Ch 1, *sc, sc, sc2tog*. Repeat * to * around and on last 2 stitches sc. Sl st to top of ch 1. (41 sc)
Row 11: Ch 1, *sc, sc, sc2tog*. Repeat * to * around and on last stitch sc. Sl st to top of ch 1. Fasten off and leave a tail to weave in. (31 sc)

I hope you get many, many happy cleanings using your Slip-On Mop Cover! You can find the Simple Kitchen E-Book HERE. You can also Pin this project for later HERE!

Please note, some of these links are affiliate link, which means that if you click on one of the product links, I’ll receive a small commission. This helps support the blog and allows me to continue to make free content. I only recommend products that I use and love. Thank you for your support. You can read my full disclosure.
**You can NOT copy pattern (or part of a pattern) and publish it on another website or other publication. Instead, you can publish a link to the pattern. You may sell products made from this pattern but not the pattern. I ask that you link back to my post. Please do not copy or reproduce pictures. When in doubt ask me, tonjapebenito@gmail.com.**


3 Comments