Are you ready for the Holidays? Well, Lion Brand Yarn is helping you out with 16 new kits for their Countdown to Christmas collection. I’m honored to be part of this collection with my new crochet pattern the Treescape Throw! You can find the kit available at Lion Brand Yarn. This is a free pattern with the chart, a low-cost PDF with written instructions is available in my Shop and Ravelry.
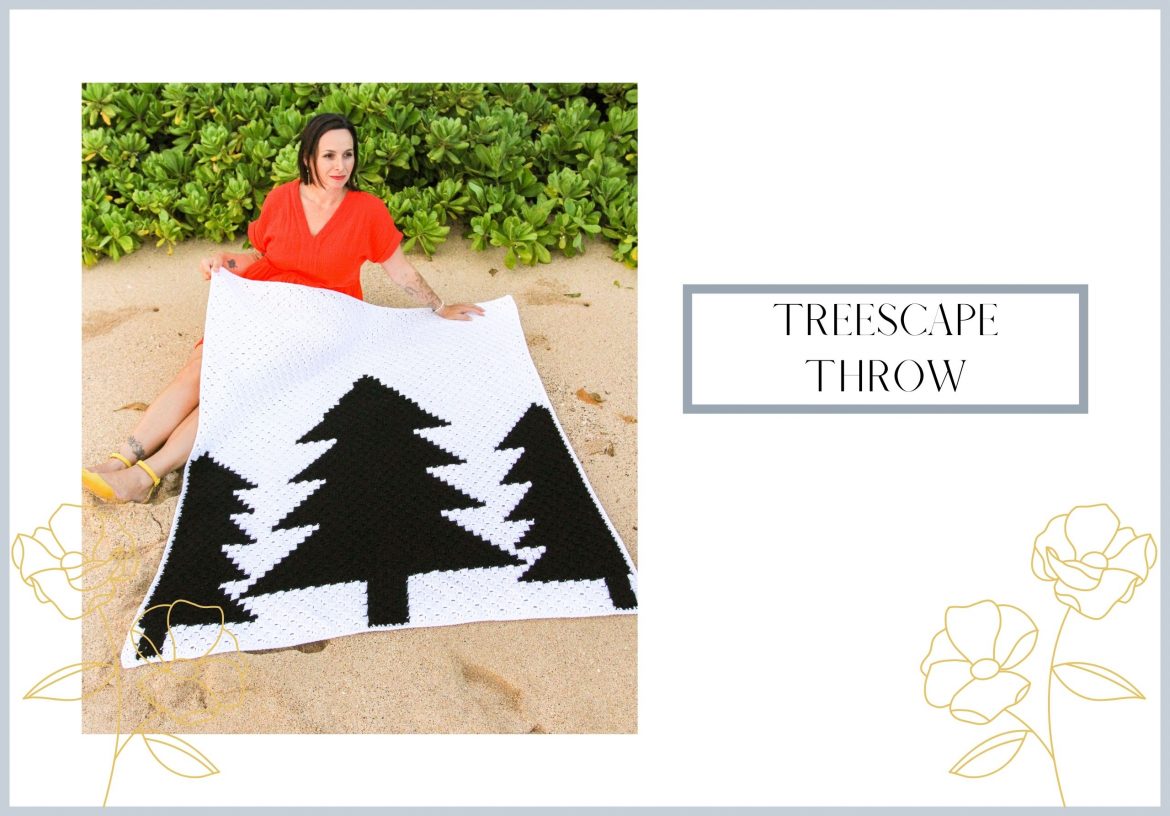
The Treescape Throw is a corner-to-corner blanket with a modern and simplistic pattern! Corner-to-corner designs work up quickly and you can choose which 2 colors you want to use. I really like how the black and white looked in this pattern for a monochromatic feel.
It was super fun to take this throw to the beach to grab some beautiful photos. The black and white really give a beautiful contrast.
I hope you love this fun pattern! Please share with me on social media. You can follow me on Instagram HERE and on Facebook HERE! Tag me @pinkplumeriamaui and use #pinkplumeriamaui. If you like this project, you can check these other free patterns: Pothos Tote, Island Summer Wrap & Ulana Bag. The Pothos Tote & Island Summer Wrap are also available as Lion Bran Yarn Kits!
DESCRIPTION
The Treescape Throw is a corner-to-corner crochet pattern and is designed to make you feel like you’re looking into a forest.
5.5 squares x 5.5 squares = about 4 in. x 4 in. (10 x 10 cm)
BE SURE TO CHECK YOUR GAUGE.
ABBREVIATIONS
beg = begin(ning)
ch = chain
dc = double crochet
rep = repeat
RS = right side
sl st = slip stitch
st(s) = stitch(es)
STITCH EXPLANATIONS
Each square in the graph = ch 3 + 3 dc
Starting Square: Start by ch 6, making a dc in the 4th chain from hook and then 1 dc in each of the remaining 2 chains (counts as ch-3, dc 3).
Increase Square: Turn, rep all steps for Starting Square.
Continuing Square: Sl st into ch-3 sp on previous square, ch 3, work 3 dc into same ch-3 of previous square.
Decrease Square: Instead of chaining 6 like you would when increasing, you will turn your work and sl st across the 3 dc’s in the last square made. Join with sl st into the ch-3 of same square. To start next row, ch 3, work 3 dc in same ch-3 sp of last square.
Increase Rows are the first part of the graph, at the beginning of each row, repeat one Increase Square then work Continuing Squares to the end of the row. Follow this method until a decrease row is needed.
Decrease Rows are the second half of the graph. Work a Decrease Square at the beginning of rows where you no longer wish to increase. Work Continuing Square across the rest of the row.
Once blanket width is reached, you will alternate Decrease rows and Increase rows until the panel height is reached. Then you will work only Decrease rows until ending with 1 square.
NOTES
Throw is a corner-to-corner pattern that starts in the lower right-hand corner. The first square in the corner is row 1. Rows are worked back and forth (down one row and back up the next) and read diagonally.
Chart is provided with the number of squares for each size.
Odd-numbered rows are worked up and even-numbered rows are worked down.
Even-numbered rows are the Right Side.
You will need to know how to change colors in this C2C pattern. You can reference my blog post, Changing Colors in C2C.
Carry colors on the wrong side of the blanket in both directions.
Rows 1-75 you will be increasing on both sides, 76-90 you be increasing on one side and Rows 91-164 you will be decreasing on both sides.
I recommend taking one skein of color A & B in Pound of Love and separating it into 3-4 even balls.
Rnd 1: ch 1, starting down long side of throw [work 2 sc in the side of each square, ch 2 at corner] on each side finishing with 2sc in last square, sl st in beg ch-1.
Rnd 2: ch 1, [hdc in each sc across, (2hdc, ch 2, 2hdc) in corner ch-2 sp] across each side, hdc in remaining sts, sl st in beg ch-1.
Please note, some of these links are affiliate links, which means that if you click on one of the product links, I’ll receive a small commission. This helps support the blog and allows me to continue to make free content. I only recommend products that I use and love. Thank you for your support. You can read my full disclosure.
**You can NOT copy pattern (or part of a pattern) and publish it on another website or other publication. Instead, you can publish a link to the pattern. You may sell products made from this pattern but not the pattern. I ask that you link back to my post. Please do not copy or reproduce pictures. When in doubt ask me, tonjapebenito@gmail.com.**