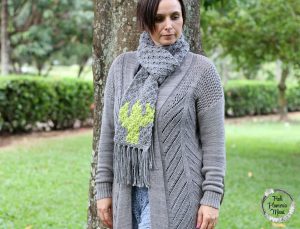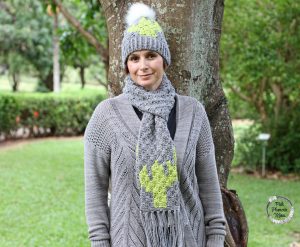
Welcome to my free crochet pattern for Crocheted C2C Cactus Scarf. The Crocheted C2C Cactus Scarf is a matching pattern for Crocheted C2C Cactus Beanie but can be made on it’s own. I love this scarf? The texture and feel of it is smooth and cozy. The cactus adds just the right amount of color and design. Using the graph for the pattern you can customize colors if you desire. You can also add a flower or two in a color of your choice using my Crocheted Layered Flower Pattern. I used simple single crochet for the border however you can add several rows for the border if you desire.
 Are you new to crochet C2C? ChiWei at www.1dogwolf.com has an excellent blog post with helpful information to answer questions about C2C crochet. Here are some of my tips:
- Grab a clip board and pen for your graph, I use a metallic sharpie to dot my squares at the beginning of each row.
- Prep your yarn by rolling into balls and separating skein into balls. I use a scale to weigh and break my yarn into 2, 3 or 4 even balls if needed. This will depend of on the size of your graph. This is a large graph so I rolled my skeins into balls and only split 1 grey into 2 balls and 1 green into 2 balls for arms of the cactus.
- Keep your ends on the back side with changing colors.
- Count your clusters every row to help eliminate mistakes.
- Change colors on the last pull through of last DC in cluster. This will create invisible color changes.
Check out my other Crocheted C2C Patterns: Crocheted C2C Cactus Blanket Part 1, Crocheted C2C Cacti Baby Blanket, Bulky Crocheted C2C Cactus Blanket, Crocheted C2c Cactus ALOE! Blanket, Crocheted C2C Cactus Baby Blanket, Crocheted C2C Cactus Pot Holder, Crocheted C2C Cactus Wall Hanging, and Crocheted C2C Cactus Pillow. All are projects that work up quick and are fun additions to your house or great gifts.
Materials Needed:
Crocheted C2C Cactus Scarf Pattern, cut the pattern and tape or past the ends together so numbers match up.
Worsted Weight Yarn. 1 Skein Caron Simply Soft Tweed Grey, 1 Skein Caron Simply Soft Chartreuse
Abbreviations:
CH = Chain
SC = Single Crochet
DC = Double Crochet
SL ST = Slip Stitch
 Create blanket scarf from graph. I cut the graph and taped it to gather to have one long piece. Remember to keep the front side your right side and the backside your wrong side and carry your colors on the backside. The graph is small enough that you can hide your ends and have double sided scarf. Below is a picture to show both sides, front and back. Can you tell which one is which? I used separate balls of grey yarn for bottom of graph and didn’t carry grey through cacti.
When you’re at last cluster, slip stitch to corner to start border, the right side of scarf should be facing you.
Row 1 : CH 2, SC in between clusters, CH 2, SC in between clusters. continue across until last SC.
Row 2: CH 1, SC, 2 SC in CH 2 space, SC, 2 SC in CH 2 space. Continue across.
Row 3: CH 1, SC across. Leave a tail to sew in and fasten off.
Attach Yarn on opposite side of scarf to create border. With right side facing you and repeat border pattern.
To make fringe, I use 3 pieces of 15 inches of yarn for 1 fringe. I evenly space 8 fringes across on each end.
Flower:
If you choose to sew on a flower or flowers, use first layer from my Crocheted Layered Flower Pattern with yarn color of choice, a H Hook and leave a long tail to sew on.
Sew in all your loose ends!
Now try on your scarf and find a mirror to admire your gorgeous creation!
Who will your Crocheted C2C Cactus Scarf be for? What colors will you use? Check out Crocheted C2C Cactus Beanie! Follow me and share your pictures on Instagram using by hash-tag #pinkplumeriamaui. Follow me on Pinterest to see what I’m pinning and don’t forget to sign up for my newsletter.
Please note, some of these links are affiliate link, which means that if you click on one of the product links, I’ll receive a small commission. This helps support the blog and allows me to continue to make free content. I only recommend products that I use and love. Thank you for your support. You can read my full disclosure.
**You can NOT copy pattern (or part of a pattern) and publish it on another website or other publication. Instead, you can publish a link to the pattern. You may sell products made from this pattern but not the pattern. I ask that you link back to my post. Please do not copy of reproduce pictures. When in doubt ask me, tonjapebenito@gmail.com.**


